Monday, 21 July 2014

How To Install Mate On Debian Wheezy

Mate is forked from the unmaintained code base of GNOME 2 and has become quite popular. To install it on your debian wheezy, the following steps are required.
  1. sudo su  
  2. add-apt-repository 'deb http://repo.mate-desktop.org/debian wheezy main'  
  3. apt-get update  
  4. apt-get --yes --quiet --allow-unauthenticated install mate-archive-keyring  
  5. apt-get update  
Install MATE core, the MATE desktop environment and the extras.
  1. sudo apt-get install mate-desktop-environment-extra  

Friday, 18 July 2014

How To Disable Window Animation In Gnome Classic

This is a rather annoying "feature". Simply disable it by typing the following in a terminal.

  1. gsettings set org.gnome.desktop.interface enable-animations false  

Wednesday, 16 July 2014

mmal: mmal_vc_component_enable: failed to enable component: ENOSPC

This is a nasty bug with the Raspberry Pi camera module, which has not been resolved. Although I cannot guarantee that my solution will work for you, it fortunately did the trick for me.
  1. sudo apt-get update && sudo apt-get dist-upgrade  
  2. sudo rpi-update  

Make sure your  /etc/modprobe.d/raspi-blacklist.conf looks like this.


  1. sudo nano /etc/modprobe.d/raspi-blacklist.conf  
# blacklist spi and i2c by default (many users don't need them)

#blacklist spi-bcm2708
blacklist i2c-bcm2708

My /etc/modules config

  1. sudo nano /etc/modules

 # /etc/modules: kernel modules to load at boot time.
#
# This file contains the names of kernel modules that should be loaded
# at boot time, one per line. Lines beginning with "#" are ignored.
# Parameters can be specified after the module name.


w1-gpio pullup=1
w1-therm
i2c-bcm2708
i2c-dev
spi-bcm2708
snd-bcm2835
lirc_dev
lirc_rpi gpio_out_pin=7

Test

  1. sudo reboot  
  2. raspistill -v -o image.jpg  

Sample output

raspistill Camera App v1.3.8

Width 2592, Height 1944, quality 85, filename image.jpg
Time delay 5000, Raw no
Thumbnail enabled Yes, width 64, height 48, quality 35
Link to latest frame enabled  no
Full resolution preview No
Capture method : Single capture

Preview Yes, Full screen Yes
Preview window 0,0,1024,768
Opacity 255
Sharpness 0, Contrast 0, Brightness 50
Saturation 0, ISO 0, Video Stabilisation No, Exposure compensation 0
Exposure Mode 'auto', AWB Mode 'auto', Image Effect 'none'
Metering Mode 'average', Colour Effect Enabled No with U = 128, V = 128
Rotation 0, hflip No, vflip No
ROI x 0.000000, y 0.000000, w 1.000000 h 1.000000
Camera component done
Encoder component done
Starting component connection stage
Connecting camera preview port to video render.
Connecting camera stills port to encoder input port
Opening output file image.jpg
Enabling encoder output port
Starting capture 0
Finished capture 0
Closing down
Close down completed, all components disconnected, disabled and destroyed

Raspberry Pi As A Radio Transmitter

GPIO Raspberry PiFirst thing you have to do is attach a jumper wire to GPIO 4. That's it for the hardware part.

The Software

The Code that does the job is called Pifm by icrobotics.co.uk .
  1. wget www.icrobotics.co.uk/wiki/images/c/c3/Pifm.tar.gz  
  2. tar -xvf Pifm.tar.gz  

Start Broadcasting

  1. sudo ./pifm sound.wav 100.5  
- sound.wav - the audio file which you would like to broadcast. only .wav will work.
- 100.5 - the FM frequency. usually between 87.5 and 108.0 MHz.

Saturday, 12 July 2014

[FIX] Unassigned class [ff00]: Realtek Semiconductor Co., Ltd. Device 5289

Couldn't get my SD card reader to work. This is what I had to do.

wget https://bugs.launchpad.net/bugs/971876/+attachment/2991730/+files/rts_bpp.tar.bz2
tar jxf rts_bpp.tar.bz2
cd rts_bpp/


Open the driver file “rtsx.c” and remove all instances of the string  “__devinit” “__devexit” and “__devexit_p” from it.

Unassigned class [ff00]: Realtek Semiconductor Co., Ltd. Device 5289
make
sudo make install
sudo depmod
sudo modprobe rts_bpp

Put in your SD card. It should be automatically mounted.

Thursday, 3 July 2014

How To Enable USB Debugging On The Nexus 7

Step 1 - Enable "Developer Options"


Go into "About device" in Settings and tap on the "Build number" entry seven times. This will unlock "Developer Options".

Step 2 - Enable "USB Debugging"


Go into "Developer Options" and select "USB debugging" from the list of options.

How To Enable USB Debugging in Android

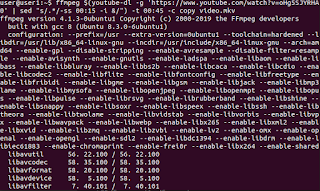
How to download a portion of Youtube Video with youtube-dl

First make you have both youtube-dl and ffmpeg installed: sudo apt install youtube-dl ffmpeg Then download a portion of your desired...