Given that I finally received my
Banana Pi, it is time for a little review of the Chinese Raspberry Pi "competitor". Before I tell you about my first experiences with the board, let's have a quick look at its hardware specs and how they compare to the newly released Raspberry Model B +.
Hardware
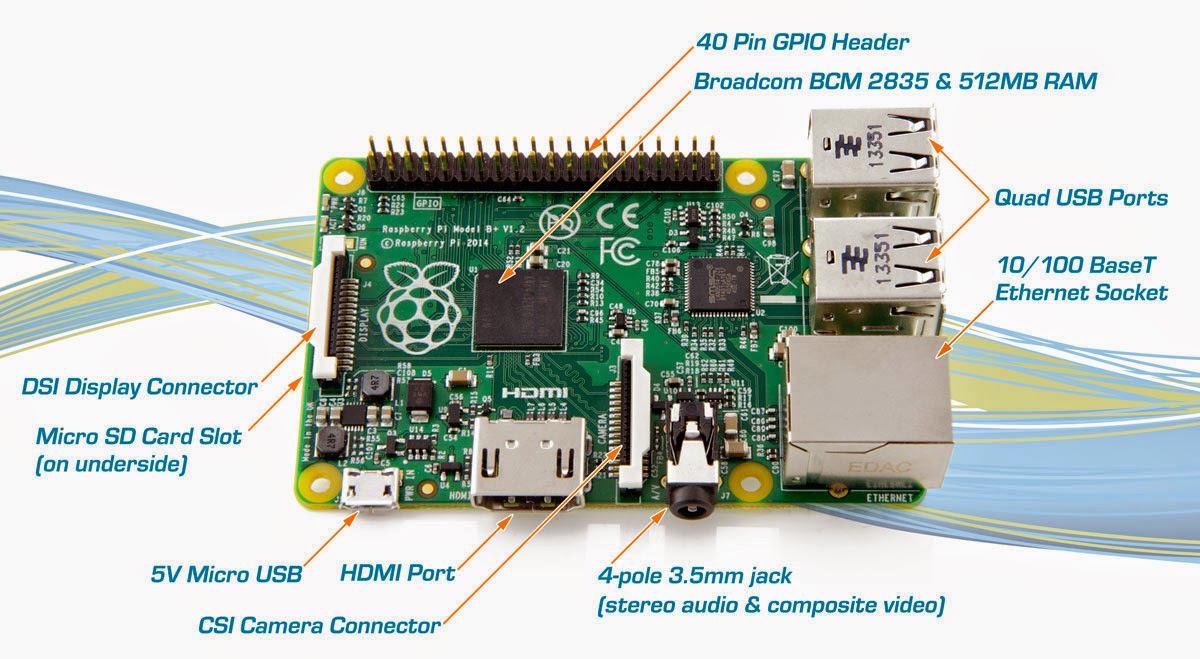
The first thing that sticks out is the Banana Pi's much faster dual-core, Cortex-A7-based Allwinner A20 system-on-chip running at 1GHz, which definitely beats the Raspberry's "well-known" 700MHz, ARM11-based Broadcom BCM2835 processor.
The Banana Pi is also equipped with 1GB of RAM and built-in Ethernet that can handle up to 1Gbps, which is approximately ten-times as fast as the Raspberry Pi's.
 |
| Raspberry Pi Model B+ |
The only area where the new Model B+ can really shine, next to the 4 x 2.0 USB ports, is the additional GPIO headers. There are now 40 compared to 26 on the Model B. The Banana Pi's GPIO layout is the same as the Raspberry Pi Model B, which makes most projects based on Raspbian and the RPi.GPIO libraries compatible with the Banana Pi.
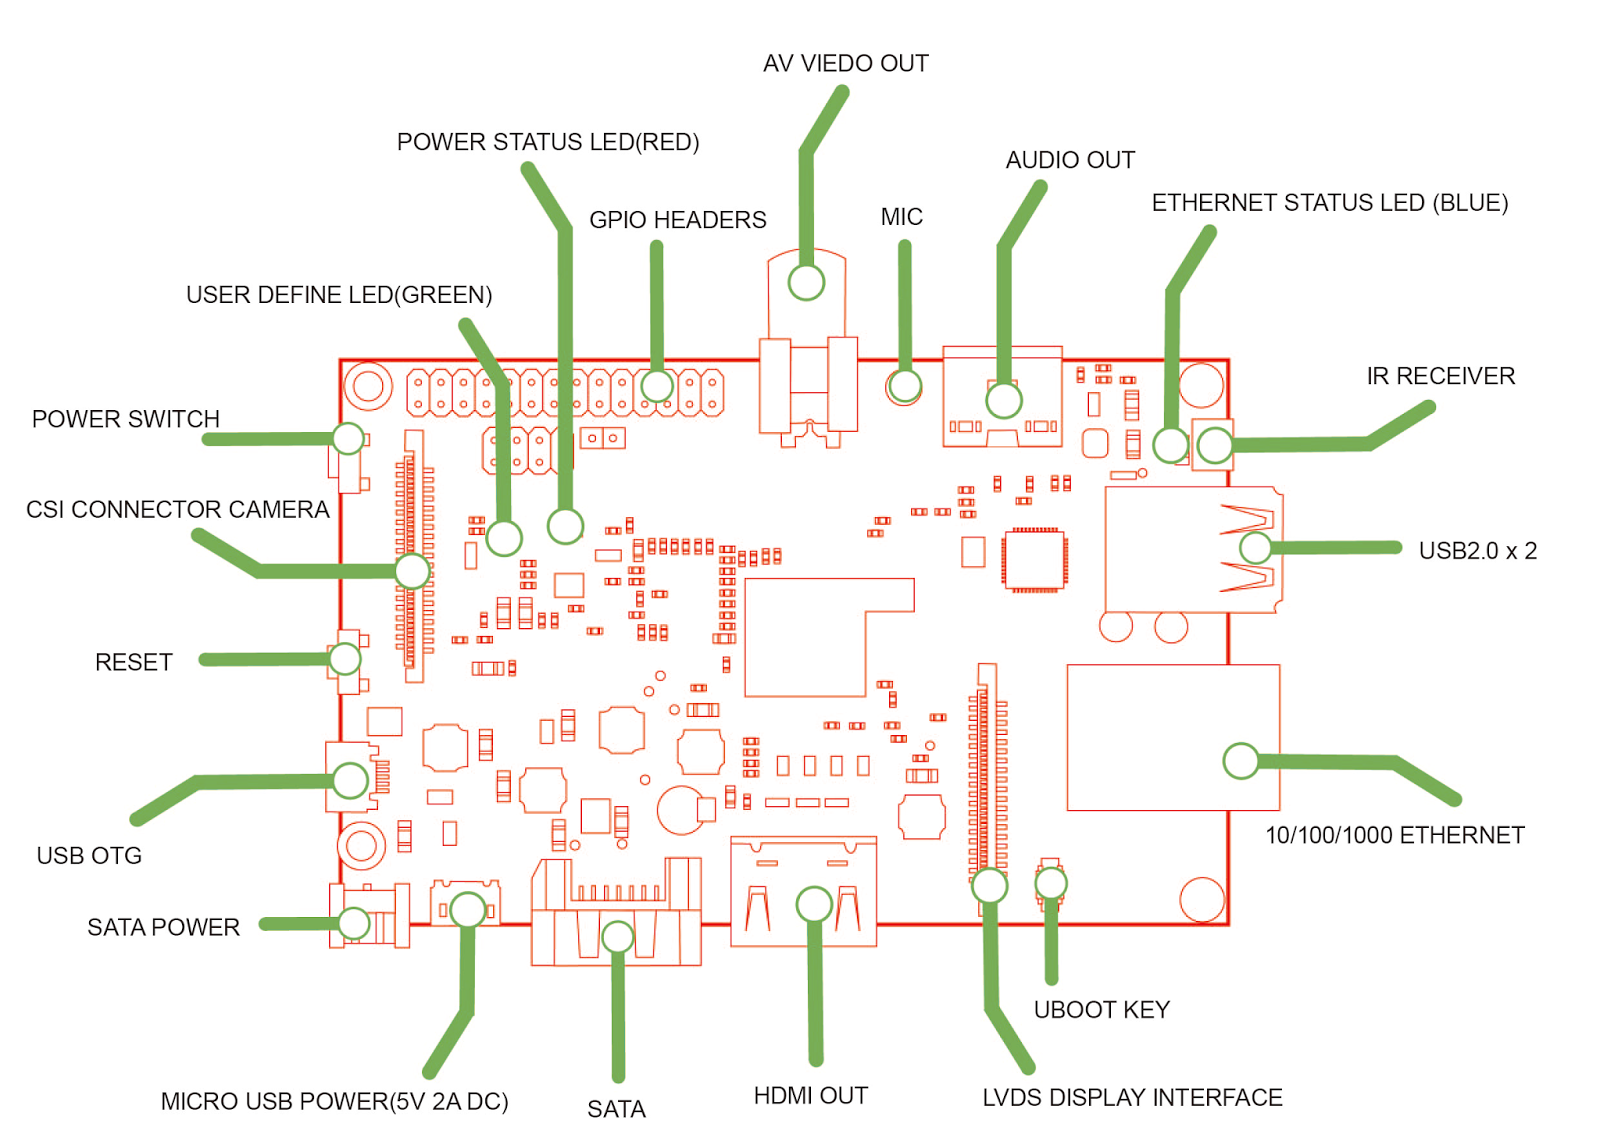
Unfortunately the Banana uses a parallel camera interface, which means that your Raspberry Pi camera board won't connect to the Banana's CSI interface. Luckily, Lemaker is working on their own
module.
 |
| Banana Pi |
Additionally the Banana Pi features some interesting ''perks'': power & reset switch, an IR receiver, a microphone, a programmable LED, SATA and a LVDS display interface.
OS & first run
The Banana Pi runs Lubuntu, Raspbian, Android, Fedora, Arch Linux, OpenSuse and Scratch. The image files can be downloaded here:
http://www.lemaker.org/content-9-38-1.html
To write the image (in my case Raspbian) to a SD card, execute the following commands:
#to get the location of your card. /dev/sdb in my case
sudo fdisk -l
#to write the image
sudo bs=4M dd if=/home/user/Documents/Raspbian_For_BananaPi_v3_1.img of=/dev/sdb
Default Credentials
No need for a fancy HDMI monitor as ssh is enabled by default. Just connect the Pi via Ethernet and you are ready to go: the default credentials are
userid: root,
password: bananapi. To get the IP address of the Banana Pi, you can either access your router's control panel or perform a scan with nmap.
#to scan for all the devices on the network
nmap -sn 192.168.0.1/24
#to connect
ssh root@192.168.0.20
First thing you might want to do is to expand the file system and disable Desktop boot.
root@lemaker raspi-config
Select "Expand Filesystem" and reboot for the changes to take effect. The next thing I did was adding a new user, deleting the default bananapi user and disabling ssh access for the root user.
#to add a new user
sudo adduser user
#to add a user to the sudo group
sudo adduser user sudo
#logout and login with your new user
#to delete the a user account
sudo userdel bananapi
# to disable root ssh login
sudo nano /etc/ssh/sshd_config
# restart ssh
sudo service ssh restart
Look for "PermitRootLogin" in the
/etc/ssh/sshd_config file and set it to
no.
Setting Up Tight VNC Server
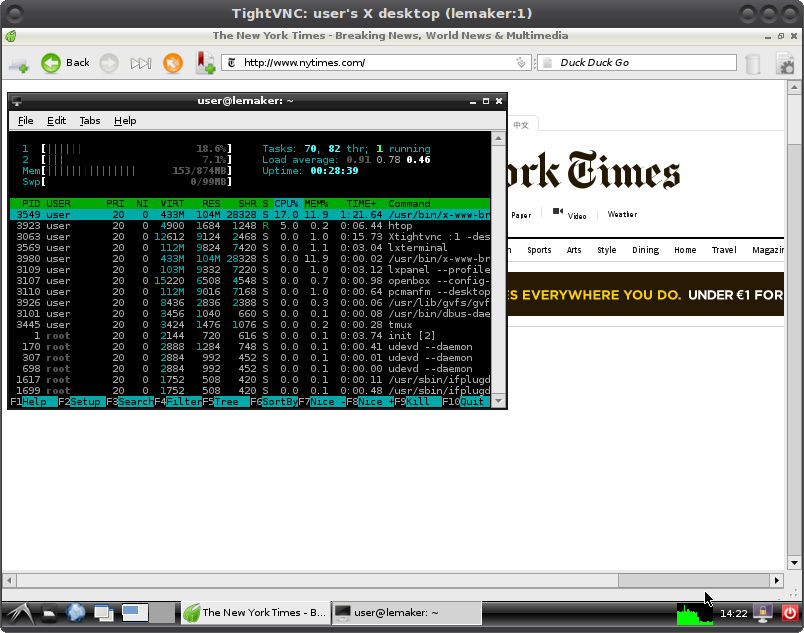
If you are like me and using the BPi in headless mode, you might want to setup a VNC connection.
# install tightvncserver
sudo apt-get update && sudo apt-get install tightvncserver -y
# start the vnc server
vncserver :1 -geometry 800x600 -depth 24
# now connect to the BPi with any VNC client. e.g. xtightvncviewer
xtightvncviewer  192.168.0.20:1
 |
| Banana Pi - Raspbian Desktop |
My initial verdict after a few hours with the Banana Pi is very positive indeed. You will notice a considerable performance increase compared to your Raspberry Pi and the board's peripherals (e.g. SATA) make it ideal for many projects. As far as I am concerned I do not see any significant downsides. Sure, there is no camera module yet and some RPi extension boards won't fit the BPi, but overall a great effort by Lemaker. I'll be back with additional tutorials.
Tutorials


