Friday, 19 September 2014

Banana Pi: I2C Barometric Sensor BMP085


Wiring

---> 3.3 volts - to vcc on board
---> ground - to gnd on board
---> SDA - to sda on board
---> SLC - to scl on board


Banana Pi - I2C Barometer BMP085
Wiring, BMP085

Locating the sensor

root@lemaker:~# ls -l /dev/i2c*
crw-rw---T 1 root i2c 89, 0 Sep 19 14:43 /dev/i2c-0
crw-rw---T 1 root i2c 89, 1 Sep 19 14:43 /dev/i2c-1
crw-rw---T 1 root i2c 89, 2 Sep 19 14:43 /dev/i2c-2
crw-rw---T 1 root i2c 89, 3 Sep 19 14:43 /dev/i2c-3
crw-rw---T 1 root i2c 89, 4 Sep 19 14:43 /dev/i2c-4
As you can see there are 5 I2C buses. With the i2cdetect tool we are looking for the 0x77 address, which is the BMP085.
# -y 0, -y 1 etc
sudo i2cdetect -y 2
We are using the  Adafruit BMP Python Library to access the sensor.
sudo apt-get install git build-essential python-dev python-smbus
git clone https://github.com/adafruit/Adafruit_Python_BMP.git
cd Adafruit_Python_BMP
sudo python setup.py install
There are some example scripts in the examples folder.
cd examples

# we need to change the bus number
nano simpletest.py
#uncomment sensor = BMP085.BMP085(busnum=2)
#and comment #sensor = BMP085.BMP085()

#run code
sudo python simpletest.py

#sample output
Temp = 23.00 *C
Pressure = 97607.00 Pa
Altitude = 313.47 m
Sealevel Pressure = 97607.00 Pa

Wednesday, 17 September 2014

Banana Pi: Temperature Sensor (DS18B20) - Tutorial


Requirements

    --> Banana Pi running Raspbian for Banana Pi
    --> Breadboard
    --> Jumper Wires
    --> DS18b20
    --> 4.7K Ohm resistor
    --> Breakout cobbler


      Hardware Setup

      Refer to the graphic for the correct wiring. Make sure the Banana Pi is switched off to prevent any possible damage.

      Banana Pi Temperature Sensor - DS18B20

      Software Setup

      Double check the wiring and boot the device. In order to be able to access the temperature data, we need to make some minor adjustments to the script.bin file, which is a binary configuration file used by Allwinner SOC.
      sudo apt-get install git
      git clone https://github.com/linux-sunxi/sunxi-tools
      cd sunxi-tools
      make
      
      #location of the script.bin file
      cd /boot/bananapi/
      
      #get the fex file
      sudo /home/bananapi/sunxi-tools/bin2fex script.bin bananapi.fex
      
      #edit the fex file
      sudo nano bananapi.fex
      
      #add the following at the end, save (CTRL + O) and close
      [w1_para]
      gpio = 4
      
      #.fex back to .bin
      sudo /home/bananapi/sunxi-tools/fex2bin bananapi.fex script.bin
      
      sudo reboot

      Reading raw data from the sensor

      After successfully rebooting your device, you will notice that /sys/bus/w1/devices is no longer empty.
      bananapi@lemaker ~ $ cd /sys/bus/w1/devices
      bananapi@lemaker /sys/bus/w1/devices $ ls
      28-000006203041  w1_bus_master1
      bananapi@lemaker /sys/bus/w1/devices $ cd 28-000006203041
      bananapi@lemaker /sys/bus/w1/devices/28-000006203041 $ ls
      driver  id  name  power  subsystem  uevent  w1_slave
      bananapi@lemaker /sys/bus/w1/devices/28-000006203041 $ cat w1_slave
      5e 01 4b 46 7f ff 02 10 8d : crc=8d YES
      5e 01 4b 46 7f ff 02 10 8d t=21875
      t=21875 is the number we are looking for. E.g.: 21.9 degree Celsius (°C) in my case.

      Banana Pi Temperature Sensor (DS18B20)
      my setup

      Tuesday, 16 September 2014

      Building Wireshark from Source - Linux (Debian 7.6)


      OS: Debian GNU/Linux 7.6 (wheezy)


      Latest releases can be found here: https://www.wireshark.org/download.html
      wget https://1.eu.dl.wireshark.org/src/wireshark-1.12.0.tar.bz2
      tar xaf wireshark-1.12.0.tar.bz2
      cd wireshark-1.12.0
      #could be that you need to install libgtk-3-dev before compiling
      sudo apt-get install libgtk-3-dev 
      #to compile
      ./configure
      make
      #now run it
      sudo ./wireshark
      Building Wireshark from source under Linux (Debian 7.6)

      Saturday, 13 September 2014

      OsmocomBB - Hardware and Software Setup - Tutorial (Motorola C118)

      OsmocomBB is an Open Source GSM Baseband software implementation. By using the sofware on a compatible phone (e.g. Motorola C118), you are able to make and receive phone calls, send and receive SMS, etc. based on Free Software only.


      Hardware

      • PL2303HX USB Serial To RS232 TTL Chip
      • 2.5 mm audio jack
      • Motorola C118 (E88)
      This is a typical pin-out of a 2.5 mm audio jack:

      L (Left Signal) Tip 1 Green
      R (Right Signal) Ring 2 Red
      GND (Ground) Sleeve 3 Bare Copper

      You need to soldier the 2.5mm audio jack to the USB Serial To RS232 TTL Chip, whereas
      • TxD is at the tip of the plug
      • RxD is at the middle contact
      • GND is the outer contact 
      2.5mm audio jack to the USB Serial To RS232 TTL Chip Osmocom

      Software

      Connect the phone to your PC and check if it is being recognized.
      dmesg | grep tty
      user@user:~$ dmesg | grep tty
      [    0.000000] console [tty0] enabled
      [ 6522.143379] usb 3-2: pl2303 converter now attached to ttyUSB0
      To make sure everything is working, install cu and connect at 115200 baud. Permissions need to be set correctly, otherwise you will run into this error: "Cannot open /dev/ttyUSB0: Permission denied".
      sudo adduser user dialout
      sudo chmod a+rw /dev/ttyUSB0
      sudo cu -l /dev/ttyUSB0 -s 115200
      Assuming the phone is switched off, press the power button and cu should display fmttool erro, which means you are ready to go!

      Compiling OsmocomBB

      Compiling GNU ARM toolchain

      Ensure you add the path of arm-elf-gcc using export (check in shell: arm-elf-gcc). This is absolutely vital as failure to do so will yield you errors when trying to compile osmocom later on.  
      mkdir gnuarm
      cd gnuarm
      wget  http://bb.osmocom.org/trac/raw-attachment/wiki/GnuArmToolchain/gnu-arm-build.2.sh
      chmod +x gnu-arm-build.2.sh
      
      sudo apt-get install build-essential libgmp3-dev libmpfr-dev libx11-6 libx11-dev texinfo flex bison libncurses5 \
       libncurses5-dbg libncurses5-dev libncursesw5 libncursesw5-dbg libpcsclite-dev libncursesw5-dev zlibc zlib1g-dev libmpfr4 libmpc-dev aptitude
      
      sudo aptitude install libtool shtool automake autoconf git-core pkg-config make gcc
      
      mkdir build install src
      cd src/
      wget http://ftp.gnu.org/gnu/gcc/gcc-4.5.2/gcc-4.5.2.tar.bz2
      wget http://ftp.gnu.org/gnu/binutils/binutils-2.21.1a.tar.bz2
      wget ftp://sources.redhat.com/pub/newlib/newlib-1.19.0.tar.gz
      cd ..
      ./gnu-arm-build.2.sh
      
      export PATH=$PATH:/home/user/gnuarm/install/bin

      Compiling libosmocore

      git clone git://git.osmocom.org/libosmocore.git
      cd libosmocore/
      autoreconf -i
      ./configure
      make
      sudo make install

      Compiling osmocomBB

      git clone git://git.osmocom.org/osmocom-bb.git
      cd osmocom-bb
      git pull --rebase
      cd src
      make

      OsmocomBB Hello world! 

      Plug everything in, switch phone off, run command and press the phone's power button.
      cd ~/osmocom-bb/src/host/osmocon/
      ./osmocon -p /dev/ttyUSB0 -m c123xor ../../target/firmware/board/compal_e88/hello_world.compalram.bin
      Osmocom Motorola C118

      Loading RSSI 

      sudo ./osmocon -d tr -p /dev/ttyUSB0 -m c123xor -c ../../target/firmware/board/compal_e88/rssi.highram.bin
      OsmocomBB RSSI

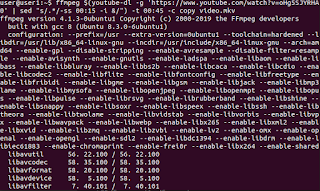
      How to download a portion of Youtube Video with youtube-dl

      First make you have both youtube-dl and ffmpeg installed: sudo apt install youtube-dl ffmpeg Then download a portion of your desired...